Tuesday, December 23, 2014

Sparkle & Shine Luminary...

Hey guys, Cheryl here.

  Welcome to today's blog post! Thanks for stopping by! 
Today I have a simple luminary for you....I love those things! I like having that bit of twinkle in an unexpected nook or corner. They make you feel warm and cozy. 
Here's the one I made.


I took one of the boxes from Harvest Happenings to make this. Before I assembled the box, I used one of my rectangle dies and cut out the window. You could also just do this when you are cutting the box out. Place a rectangle where you want it to be. Then I laid the box top...unassembled....on top of the box bottom and traced it lightly. Now place the same die right over that and cut. This makes sure they line up right. Be sure you have them facing the right direction! Ask me how I know this, lol.

I then used that die and the next larger together to cut the frame for the front. Again, you can do this same thing in Silhouette Studio to make a frame.
Before assembling, cut a piece of vellum and adhere it to the back side of the box top, assemble.


I cut the pieces for the poinsettia and ran it through the Cuttlebug using a swirl folder. I inked the edges a bit, and assembled.

I also cut/punched some snowflakes and embossed them with gold embossing powder. Love the sparkle! I wrapped a bit of lace crocheted ribbon along the bottom edge. Added a bit of red Stickles glitter and some bling and some red stars.


I chose a sentiment and embossed it in white and cut a simple flag end. I hid the glue under the snowflake, as it shows bad through the vellum. And that's it!

Here's where to get what you need to make your own.


Friday, December 5, 2014

Shaker Christmas Tags...

WOW...am I ever a slacker!!! I have never had a time where I've had no mojo for so long....and really didn't even care, either. Well...I think it's coming back. Just can't come up with any neat ideas, I come up here, sit and play around....and most of it goes in the trash can. Bout to try changing that!

So...I have a set of shaker gift tags for you today. I used files from My Scrap Chick and a few of my stamps. I love all the shaker stuff I see, and thought these could serve as a gift tag and an ornament for later, our for someone to reuse as a tag for someone else. 

I used the tag file and selected different ornaments and cut them out of the center for the window. Use any type of clear acetate to glue to the back to make your "window". Build up a "wall" of foam tape on the back side to hold the sequins. Then adhered the back tag. I decorated the fronts, added a tag, then some ribbon. Each were done in this same fashion. I added some bling on a few, a bit of Stickels glitter, and called them good to go. Hope you like them and try some of your own. 

For each tag, I only used one of the layers....they come with three. I stretched them a bit in each direction to get a size I liked. You could use them as they are but I wanted them a bit wider. The tiny tags attached at the tops are made with a die I have. You could size the tag down REALLY small and do the same thing. Size two layers together though, so they layer nicely.


This tag I used two of the elements in the file. Added them in their proper place using foam squares.


For this one, I stamped a Christmas tree and just cut it out and added with foam squares. Added a bit of tiny pearls for ornaments.


This tag I sized the ornament down a bit and then added it with foam squares on top of the acetate window. You can see the material inside around the edges.


Ho Ho Ho! I used bling for the centers of the "O's". I only used the top layer in this file.


For this tag, I only used the base layer of the candy cane and I flipped one to go the other way, then just made them crisscross a bit.

Here's what you'll need to make these yourself.


Sunday, October 5, 2014

Frightening Cute...

Here's just a quick card for today using My Scrap Chick files. Sometimes things come together quick for me, and other times I seem to slave, lol!!! This fell right into place. Hope you like it.

I used a simple scarecrow file and chose fall colors from just scraps. I inked up all the edges for interest and added some gel pen accents. The patterned paper just fell into place....don't ya love when that happens?!


I stamped the face with a super cute Peachy Keen face stamp and then mounted it onto an Action Wobble....how cute are those, right?! The sentiment is from My Creative Time. 


That's it....easy peasy! Hope you got something new from today's post....Happy Crafting!


Thursday, September 25, 2014

Autuumn leaves....

Ahhhh....Autumn is coming!!!! My absolute fave time of the year. I love everything about it....the colors, the crisp air, the smells, the sounds....love it all! Anyway, that was the inspiration for this project, plus I needed a bit of fall decor, lol. So....here you go!


I had never made this box before and for some reason thought it was on the smaller side. But it's not! And, oh wow....I LOVE it! This is perfect for so many things! It will actually hold a nice amount of anything. Homemade cookies, Christmas candy, caramel corn (a fall fave), and fall leaves, lol!


The one thing I love about paper crafting is that you're the boss...you can customize anything for any season or occasion. This is super cute in fall colors, but how cute for Christmas with a Santa face or Christmas tree? An Easter bunny on the front and filled with Springtime goodies. The possibilities are endless!


I did a lot of inking on all the edges. I embossed a bit and added some white gel pen accents and some bling to the centers of the flowers. I printed my pattern papers and also inked those up. I popped up the element with foam squares. I hope you got a bit of inspiration from this and will try one of your own.

Here's what I used.

Pink Paisley Prairie Hill Paper (might be retired)

So, get out your supplies and create something fun for your home. Or make something for a friend! 
Happy Crafting!


Monday, September 1, 2014

Karson and his cars....

Well....today is my last post for this term over at My Scrap Chick. It has been an honor to be on their DT and I am so thankful to Kristi and Valerie for having me.
So....my most adorable grandson, Karson, is in LOVE with cars...and all things with wheels, lol. He stays with me every day and he plays with his cars all day long! He can even tell you all the parts of the car...thanks to his dad....and he's only 2! This project is for him.

To begin, I made the three Firecracker Boxes, and just did away with the fuse on the tops. These are so fun and easy to make! And you could decorate them for anything!


 I thought this would be fun for his Mom to set on his dresser in his room. The paper collection I used for this is Scoot from Echo Park. Most of the cuts are from My Scrap Chick, but used a few stickers from the collection.


How cute are those parking cones?!


I added a few bits of the flag stickers and scattered a few stars around. Tied a button on with twine.


I added the airplane and then the sticker being pulled along. And I must say, Karson is super cool! I added a few more of the flags, stars and added a cloud here and there as well. That chugga chugga sticker couldn't be more perfect!


And the little car and driver that was my inspiration for this project. And it just grew from there.


 And here is Mr. Karson driving his car!  I can really see him exactly like this when he's older. Again, all the cuts from My Scrap Chick, and some added stickers. Another button and twine, too.


So, there you have it. My final project for MSC. I hope I've given you a bit of inspiration along the way. Keep on coming back cause I'm not going away...I'll forever be a crafter and post my projects here. Hope y'all come back!

Here's my list of ingredients used.


 So....get out your supplies and make something fun with paper!!! Happy Crafting!


Thursday, August 28, 2014

Fall is coming....

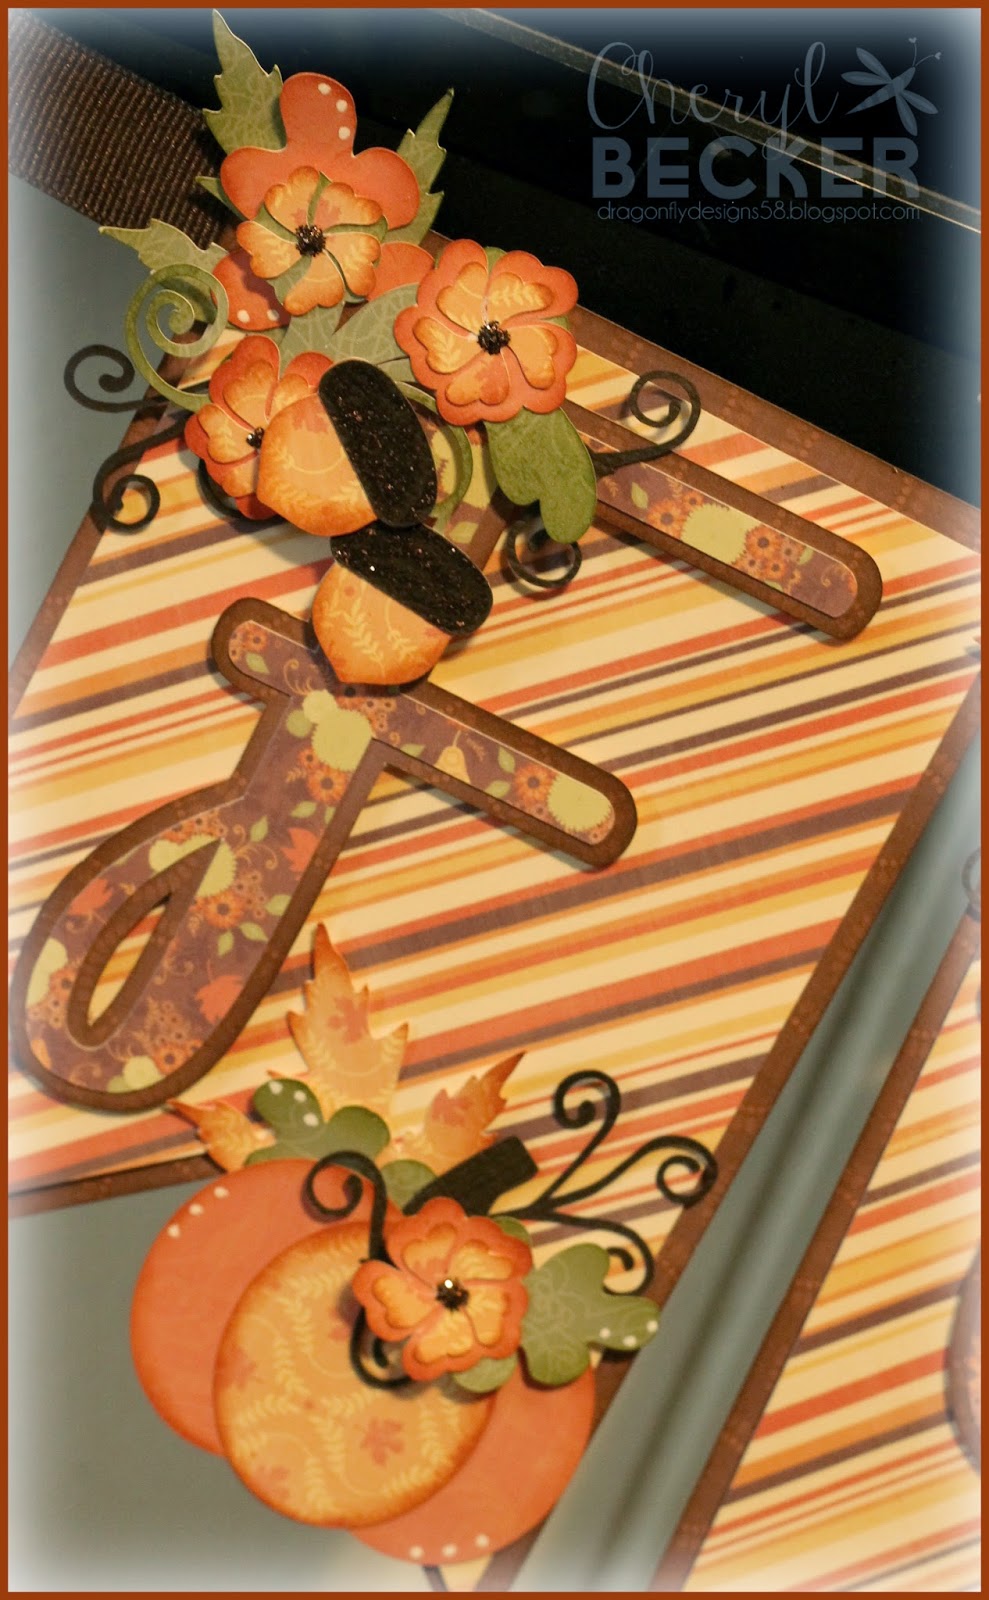
....And oh how I love fall!!! It's my favorite time of the year and I love making fall projects! So, for my DT project for today for My Scrap Chick is a fall banner. Not hard to do at all, just laying it all out, and add to it till you're happy.

I used the basic banner and created a mat layer, found a font I liked and created mat layers for that as well. I put that much of it together, then went on a search for fall bits to add to decorate it.
I chose leaves and acorns and pumpkins...I wish I the smells of fall in my craft room...that would have made making this project all the more fun!
So...let's see some pics. 


 All I really did was inked up edges, used some dimensionals, added a bit of Stickles and white gel pen accents. Then laid things out in groupings till I was happy with it. Then adhered it all down.

I could not get a good pic of these, and ran out of time. But there is a bigger acorn on each end of the banner. Here is a pic of what they look like.


Here's the papers I used from all my digital files. I just really liked the colors in this set.


Hope you like it and will try one of your own! Here's what I used.


Sunday, August 24, 2014

Gatefold Card...

Man, have I ever been slacking!!! I have been making cards, just not getting my blog posts written...maybe today I can get a few finished. 
However....I have been in the hospital so I'll use that as an excuse. My heart has been giving me some issues and needed it checked out. Have some arrhythmia I guess.
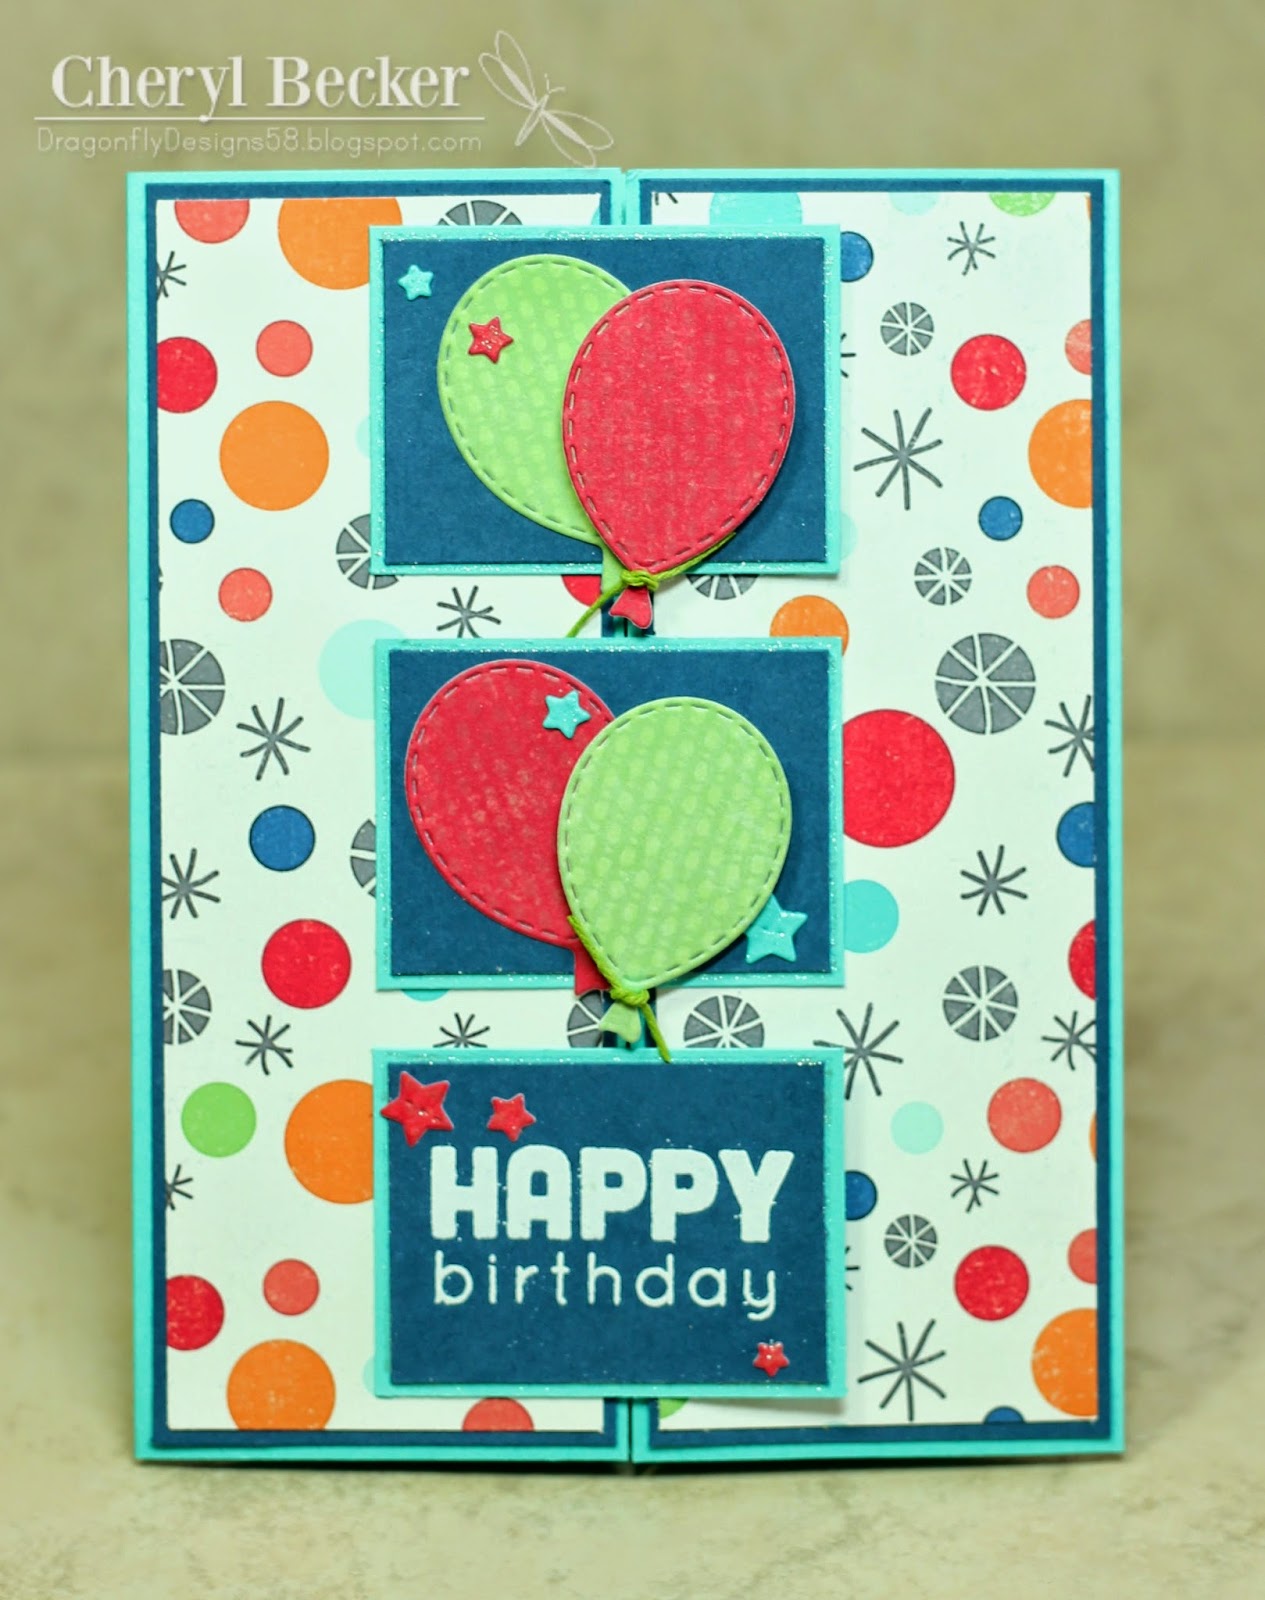
Anyhow...here's my card for today.


It is a standard A2 size card. Score at 2 1/8 on each end of the long side. Fold and it should meet right in the center. I cut a few rectangles and a layering piece. Attach the top and bottom one to the left side, and the center one to the right side.
I heat embossed the greeting and added a few stars here and there. The front balloons are on dimensional adhesive.


This gives you a better look at how it closes. I like this style for something a bit different. Can't see well, but added some Wink of Stella to the stars and around the navy pieces.

Hope you like, thanks for stopping by!


Monday, July 28, 2014

Shirley, Goodness, & Mercy Chicks....

I'm up today for posting a DT project for My Scrap Chick. 
As soon as I saw this set, I knew I loved it and knew I had to have it! They are so darn cute!
Anyway, I chose to use Shirley on a card. So here it was I came up with.


I made her at the size she opened to and didn't even look at what it measured. Just cut the pieces then assembled. I created a shadow background and then saw how big she really was! Lol...not terrible....but probably would have sized her down a bit. But I didn't, so this is a 5 x 7 card. Which is fine, but I know most of us do 5.5 x 4.25. So keep that in mind should you make this. Next time though, I'll take her down a bit.

I like the country feel of these ladies so I set to looking through my digital paper files for something that had that country feel to it. And I found some! It is by Carta Bella called Traditions. Very nice selection of papers for a country feel.

 Anyway, now I needed a sentiment. This card could really go for anything as it really has no theme to it. So I chose a sentiment that could really go for any occasion or no occasion at all. Just a whatever card, lol.


So this is the one I chose. It is from a set from Simon Says Stamp. You can get it here.
So that's about it. I added a bit of inking to the edges and some white gel pen accents and called this one done! Hope you like it.


So...get out your supplies and go make a card!


Saturday, July 26, 2014

Fleurette Bloom Blog Hop...


Welcome to our July Design Team Blog Hop. We have some fun and creative projects to share with you. Hop to the blogs listed below and check out what we have created for you. Be sure and enter to win a $10.00 gift card to the Fleurette Bloom SVG Shop! You have a chance to win at each Design Team Members Blog, just by leaving a comment at each stop of the hop, and become a follower if you are not already! Good Luck! 

How fun is this?! Our first ever blog hop! Stay tuned, cause I'm sure we will have more. We hope you like our projects for you. We did a Summer/Picnic theme. Had fun coming up with a few things to make.


When I think of Summer I think of gardens and canning produce. So...I chose to use Mason jars for containers for some goodies. In one, I put some Pixie Sticks for the kiddos. They scream Summer to me! And I know the kids will love them. In the other jar, I put some fun straws to use with fresh made lemonade. I cut some cute dragonflies and attached to a few straws and decorated up around the jars. I mounted them on the circle/scalloped element from the Valentine collection. Papers for these were printed from Bohemian Chic.


 For my candy treat bags. I used the files for the Anytime Pillow boxes. I sized it WAY down, mirrored to the top and welded them. Then I cut off everything except the handles, for the topper for my treats. Worked out pretty cute!


Almost every picnic has hot dogs, right?! So I cut some cute boxes to put your hot dog in. I thought they looked super cute and the perfect size! It is a file in the Holly Days collection. And....I printed those adorable papers from the newest paper collection called Summertime Fun. LOVE this collection of cute papers! 


So...here's what I used for my projects.

Fleurette Bloom
Summertime Fun Digital Paper
Bohemian Chic
Valentine Be Mine
Holly Days
Anytime Pillow Boxes
Moonbeams & Fairy Dust

So, there's just a couple things that could dress up your picnic table. Could have come up with a lot more, but time ran out, lol! Hope you got a bit of inspiration today. DON'T FORGET to leave your comments for your chance to win the gift card giveaway.


 Enter to win a $10.00 Gift Card to the Fleurette Bloom SVG Shop!
Just post a comment on this blog post
and become a follower of this blog
(if you are not already)
It's that easy!
A winner from each blog on this hop will be selected.
So, you have multiple chances to Win!
Thanks for hopping with us and good luck


Have fun on the hop! I know you will love what you see. I am the final blog, but if you didn't see the rest, you can start at Fleurette Bloom.

Fleurette Bloom
Ilda Dias
Courtney Lega
Kristin Courtney 

 Chantel Schroeder-Groenewald
Cheryl Hoogenstyn Becker