Monday, October 29, 2012

8x8 Layout...


Happy Monday everyone! This is my first layout since coming on the team. I'm not much of a scrapbooker but I've always liked that Emma does 8x8 layouts, and somehow that seemed more "do~able" to me. So then....here it goes!
Our "assignment" was to pick an alphabet letter and then have the things on our page start with that letter. So, I chose B. And the theme of my page is Beauty, Buttons, and Bows.  
Here is my beautiful grand daughter, Aleida. She is the "Beauty" of my theme. Her Mom is learning to do photography and shoots her at every chance she can get. How sweet, sitting in the grass and playing with dandelions! I used my Silhouette Cameo to fill the 8x8 square with a pink pattern paper from my digi library, as well as with the label shape in black and white polka dots. 
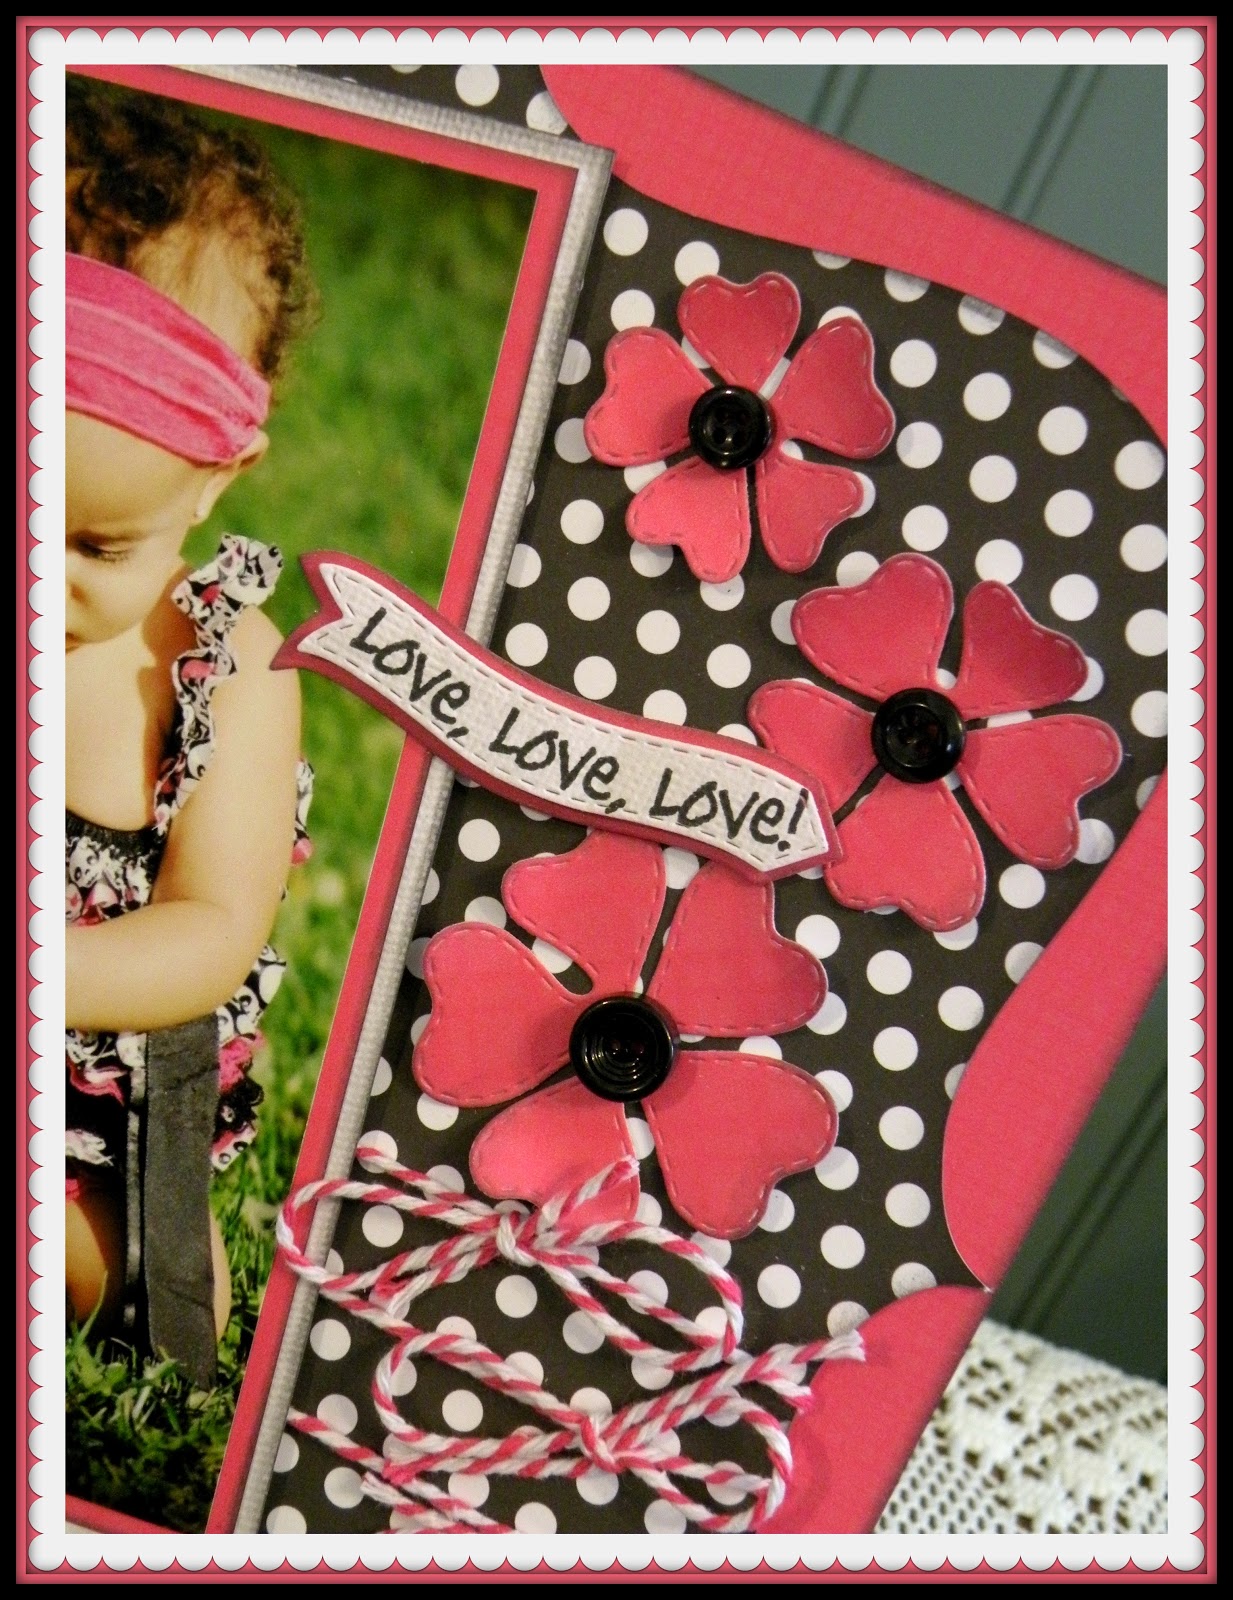
I used one of Emma's dies....Flower Petal Dies...for my flowers. The flower centers are the "Buttons" of my theme. I also used the Fly Away With Me Sentiments Stamp Set, that comes with a cute banner die. The sentiment is from another set called Just Simply Live Stamp and Die set. I love that little banner.
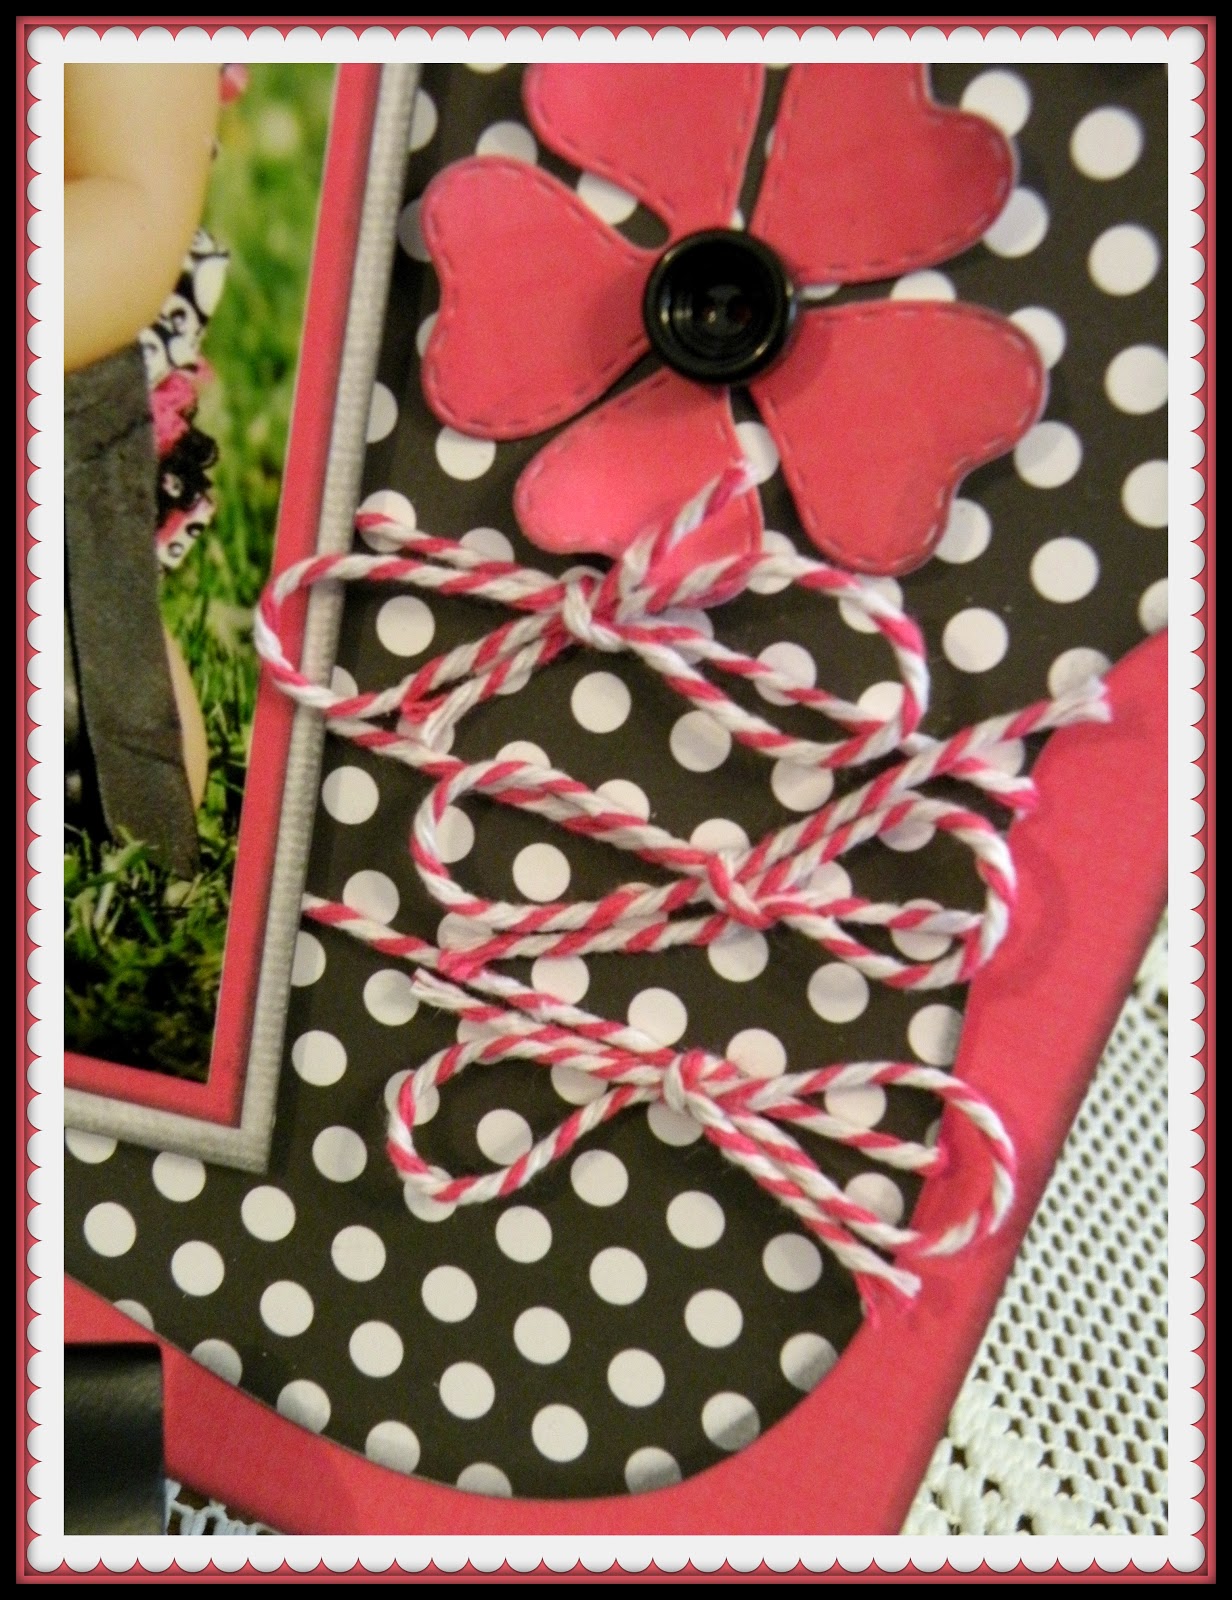
I added three rows of twine tied in "Bows" to finish off my theme. I love the soft touch using twine gives to a project. If you notice, I also softly inked edges of elements used in my layout. It adds a bit of dimension and takes the hard edges down some.  I also added foam dimensionals to the back of the photo for more interest too. I'm finding myself stretched a bit having to do layouts, and I have to say....I'm loving it. I know in time, it will become easier and my confidence will build. For now, I will stick with 8x8 size layouts, and maybe move on from there. Although, I've got my hand into Project Life too, so that will give me the larger format, that is very quick and easy to do. 


Don't forget to go and see what the other design team members have created. I know you will enjoy yourself!


Thursday, October 25, 2012

Jumbo Tag...

Ruthie has set up this challenge for us and has chosen to do large tags. How fun is that?! I chose a tag from a set over at SVGCuts that is in one of the newer sets called Midnight Jamboree. I edited it a bit by removing the pumpkin face cut outs and widened it to fit this challenge.
  I used the Rolled Flower Dies for these adorable little flowers. Then I glittered up the edges a bit, after inking them. Aren't they just the cutest!
I added a couple little ghosts from one of Emma's Halloween sets called Treats For My Sweet. I distressed them a bit with some Tim Holtz distress inks. 
I used my Cameo cutting machine to print/cut some of the elements that are in the Echo Park Chillingsworth Manor paper pack. I love my Cameo for print/cut, it is always spot on! Thanks, Ruthie for putting together this challenge, it was fun!

Tuesday, October 23, 2012

Technique Tuesday...3D Flower


Here we are again, for another Technique Tuesday. This is my first time doing this, and I was excited to show one thing that I like to do.
These are the items you will need to do this technique.
Use your favorite inking method to ink the edges, both sides. You will need 6 flowers.
Cut in between every other scallop. For each flower that you cut into, gradually make each cut further towards the middle. So your first two flowers, cut just a little, for the next two, cut a bit deeper, and for the last two, cut the deepest. Because you will be making each layer a bit tighter, you need the cuts a bit longer for each layer.
Use you skewer or something similar to curve each scallop inward. So the two scallops that make up each petal, curve in towards each other. Do this to each layer.
Like this.
Using your hot glue gun, begin to put the layers together. Be sure when you put the next layer down, that you don't have one cut right over another cut. Rotate just a bit so the cuts aren't right above each other, as seen here.
For each layer you add, begin to close that layer a bit tighter, overlapping each petal, as I've done above ~ the right one. Continue rotating each layer.
As you can see, your last two layers will get closed up almost all the way.
The final petal.
TahDah! Pretty flower, huh?! Now, attach to a project or use however you'd like. Here's what I did with mine.
Isn't it pretty! I love how this came out. The inking of the edges really adds a nice soft finish. Cuts down on the harsh edges I think. I found some amazing ribbon that is made of natural fibers and it looks so lacy! I love it ~ going back for more colors! 
I love the dimension this flower gives. You can't mail a card like this, but you could attach it to your gift or hand deliver it. Anyone would love to get something this pretty and soft! 
I hope you learned a bit from my Technique Tuesday. I can't take credit for this, as you can find lots of tutorials for it on YouTube if you do a search. Emma's little scallop circle die is perfect though, and makes a nice sized flower. Make sure you check out the other designers projects and learn some other techniques you can use on your own projects.

Head over to check out the posts of these designers, and see what they made for you.

Thursday, October 18, 2012

Spooky Scarry Mailbox of Treats...

***GIVEAWAY***
This wouldn't be a party without a FANTASTIC prize .... right? Random.org will pick ONE winner each day to win ALL OF THIS! All you have to do is leave your comments for a chance to win ALL of this! DON'T FORGET to leave us you contact information just in case YOU are one of the LUCKY winners! You have until Sunday at midnight to leave your comments! GOOD LUCK!:)


**SALE INFO**
We are ALSO having a sale going on RIGHT NOW that will end on Sunday, Oct 21st @ midnight!  Use the code SPOOKY & start shopping here!


If you arrived here from Cathryn's blog, you're in the right place! Make sure you don't miss anyone, there will be lots of great things to give you inspiration!


I had a lot of fun coming up with this project for our Halloween Blog Hop. I used a mailbox from SVGCuts to fill will notes and goodies. When I went to fill this with treats, I knew I wanted to use the Bubble Gum Treat Box Die that Emma has designed. I had seen these put together a different way somewhere and wanted to try myself. I trimmed a bit off one of the ends and folded the flaps in and glued closed and then finished off the top as it was designed.


 To make my little spooky notes, I used another die from  MCT called the 3x3 Fancy Envelope Die . I also used one of Emma's newer stamp sets called Just For You Stamp Set. I taped off the top part of the Spooky Treats stamp and used the bottom portion that says Wicked Ghostly Greetings, so appropriate for a Halloween mailbox. You can write some little ghostly greetings of your own to your favorite Trick~or~Treator!


I also used a newer set called Piles of Smiles for the leaves and pumpkins on the side of the mailbox. Another pumpkin is from Treats For My Sweet. I used a lot of the stamps out of this set...I love it! The front door of the mailbox has "Boo", also from this set.  The ghosts are tucked in here and there.


I made a rosette by scoring and then folding a strip of paper and then on top I used the Scallop and Stitched Circle Die. The stamped layer is again from Treats For My Sweet. I use one other circle stamp from All Around Goodies Stamp Set.


I did lots of inking the edges of each element, I think it adds just that little bit extra. I also put some Washi tape along the bottom edge for some added interest. The papers I chose are from Echo Park's Chillingsworth Manor. I use digital papers and print what I need when I need them. I love doing that! I never run out or wish I had just a little bit more. You should give a project like this a try, you can customize it for any occasion!


Here's the blog hop line~up. Check out the great things each designer made.


Tuesday, October 16, 2012


Mark you calendars! Join in the fun.

Tuesday, October 2, 2012

Pumpkin Lanterns

Been trying to get a few fall things made and put up in the house. I LOVE fall and all the colors, smells, and sounds. I love the crisp night air and backyard fires. Anyway, I made a string of lanterns and jazzed them up with crinkled ribbon, twine, and die cut leaves. It would be nice if they could light up but there is no way to put a tea light in there and get it to turn on. But I might put some laying on top of the mantle sort of strung in and amongst the photos. The lantern is a file I got in the Silhouette store. Quick and easy to make, you should give these a try if you have a Cameo. I want to make a few of the spiderweb ones as well.

Designed by
Cheryl Becker


The leaves don't show as well as I'd hope, but it really adds a nice way to finish off the top of these lanterns. 


Hope you like this little bit of fall. I will be adding pieces to the top of the fireplace and as I get them finished, I'll update pics so you can see how it's coming along. Get out you cutting machines, pull out some pretty fall papers, find your mojo and decorate your home for fall! Happy crafting!