Wednesday, November 8, 2017

Christmas Fairy

Hello crafters!
 I have been hit with a dreaded bug, and I'd wanted to get this card up, but being sick has had me delay it. Feeling better today, so getting this written up.

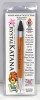
I used the new poinsettia fairy from the new release from InkOn3. Such a cute image, totally unique! Fleurette has her own style I've not seen in other stamp companies. I played with my new Spectrum Noir alcohol markers to color this. And I struggled with good blending until a team member reminded me about using X-Press It paper for coloring with these type markers. I remembered I had some, got it out, and re-colored. And it went so much easier! If you haven't tried this paper, and struggle, maybe you'd like it. It's VERY bright white but it isn't real sturdy/thick. I'm ok with that if I get better coloring results.

Here's my beautiful fairy.


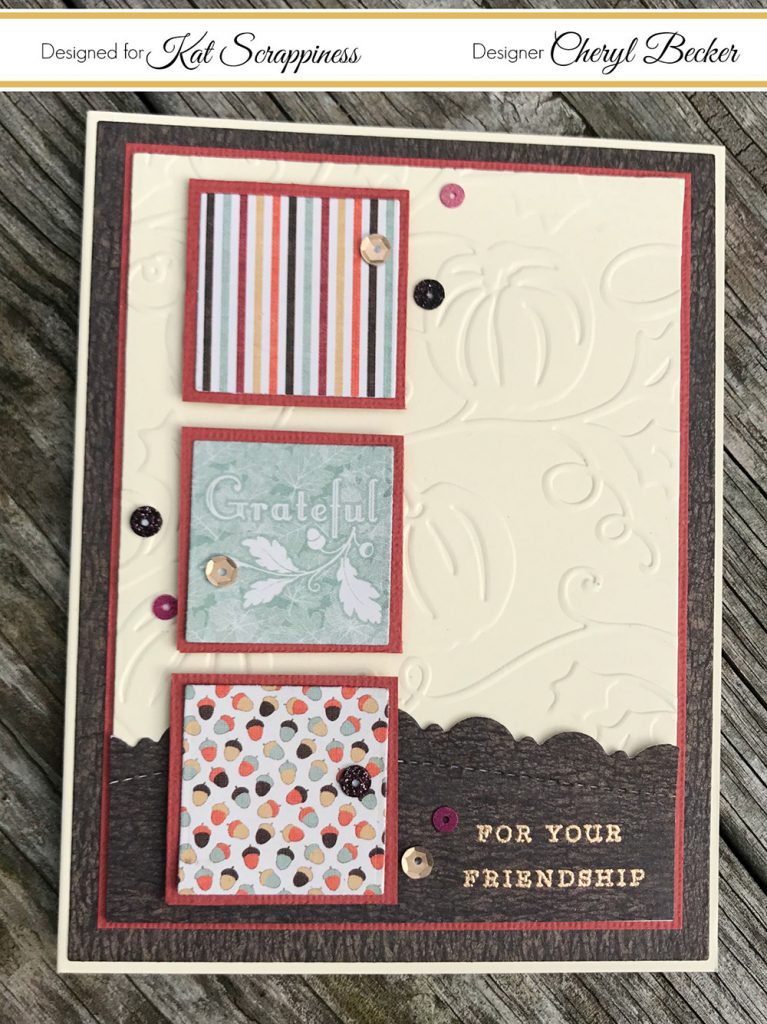
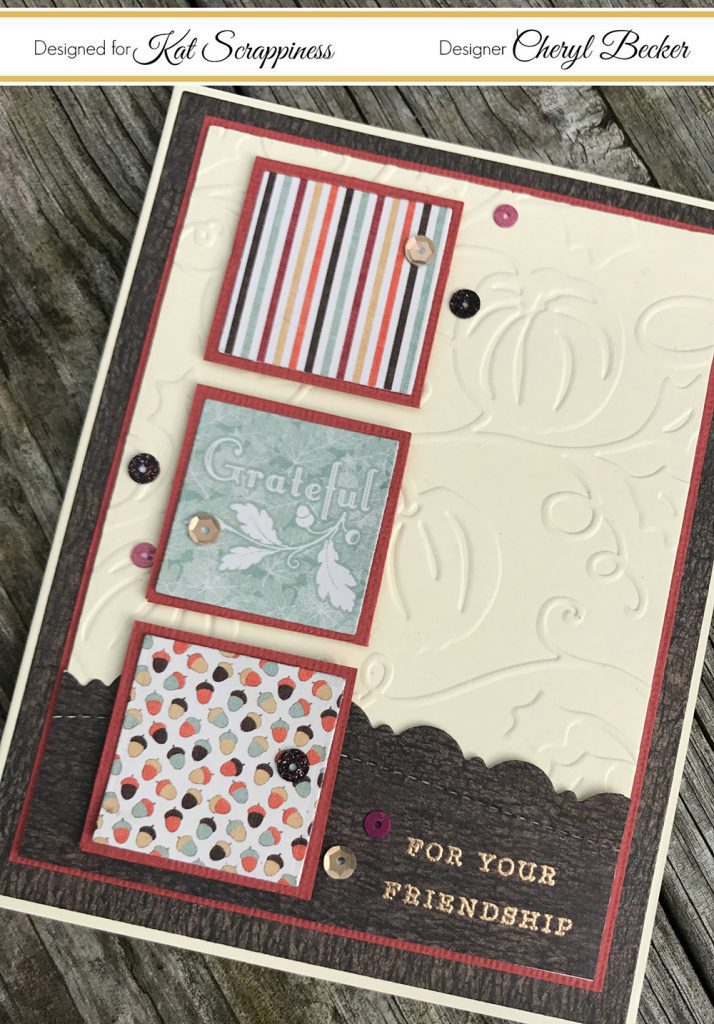
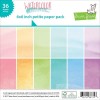
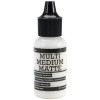
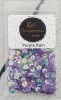
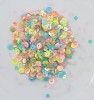
I stamped and colored her on a piece of X-Press It paper for alcohol marker coloring. I then went through my other stamp sets and chose a few more images. I stamped them out, colored them, and then fussy cut them out. I arranged them as if the fairy is reaching for the bells. I added them with some dimensional adhesive for added dimension since the fairy is flat on the paper.  I added some sparkle to the jingle bells and some Glossy Accents over top to really shine. I added reg Stickles to the berries and gold to the flower centers. Adds some nice sparkle! Then I chose a few sequins from my stash and scattered those around. I stamped the sentiment and cut with a die. It was also added with foam tape. 


I hope you like my pretty fairy and will head over to InkOn3 to shop for some goodies! Here's a shopping list for you.


Head on over to the store and pick up some fun new goodies to play with. Lots of great sets for any medium to color or paint. Get out you things and have some fun crafting!


Thursday, October 26, 2017

Mariner Mermaid

Hey everyone, I have a quick card to share with you today using the super cute mermaid image from Fleurette's last release. I'm a little late with this but better late than never! Life got crazy for a bit, lol. 
Anyway, let's get to it.

I used a die from my stash, Stamps Of Life I believe, and cut it from some watercolor paper. I then stamped the mermaid on the largest piece and several of the other elements onto the smaller pieces. I then went about to color them.


I took the frame piece and smooshed VersaMark ink all over and embossed with silver embossing powder. I wanted it to look like metal. Instead of using acetate for my shaker window, I used tule. I've done this many times, as I find all my shaker bits stick so bad from static and I'm not a fan of that, lol! 


Plus, I like the texture it gives. I added all my shaker bits and adhered the frame to a white card base. I then took the other images I colored and glued them into the squares they came from. 

I stamped out the sentiment and embossed with silver embossing powder as well. I mounted it to a piece of white and then dimensional adhesive to the front of the card. 

I hope you got a bit of inspiration today. Keep watching as new things coming! Another release just came out and I'm working on projects using those products. Cool stuff. You won't wanna miss it!

Here's your links for shopping.


Head on over, check out all the amazing stamp sets, and other crafting supplies. And don't miss the new release!

Sunday, September 17, 2017

Grateful


Hey my friends, Cheryl again today, with another card project for you. Today's card is mostly just dies and patterned paper. Added one tiny stamp and a few sequins. So, let's get to it.
I have used the KS Never Ending Dies and the new KS Border Dies. And I also took advantage of some of the cute images in my patterned paper pad. I love to use them, everything coordinates, and they are quick and easy cards. You could whip some out really fast. The papers I used are from Authentique, called Bountiful.


I used the KS Never Ending Dies to cut the dark patterned paper in the background and also to cut the patterned paper squares. I cut the ivory cardstock and used a fall embossing folder. I matted each of the squares and the ivory piece on rust colored cardstock, for a pop of color. I also cut a piece of the dark brown patterned paper and used the KS Fancy Scalloped Border Dies on the top edge. I chose a sentiment from Hero Arts Thank You Messages and embossed it with gold embossing powder.


I used foam tape on the back side of the squares and spaced them out evenly from top to bottom. I then added the entire panel to an A2 piece of ivory cardstock. I chose some sequins from KS Sangria Masquerade Sequin Mix, scattered them around and glued in place using liquid glue.
So that's it. Easy and yet cute. No one says a nice card has to take a long time to make, and these elements included in paper pads are great to use! Hope you got a bit of inspiration. Here's where you can find these products and many more.

DON'T FORGET to use the coupon Cheryl10 to get 10% off your order! Get out your supplies and have fun crafting!

Wednesday, September 6, 2017

You Are Blessed


Hey fellow crafters, Cheryl, here today. I have a card to share using some of Kat's dies in different ways. So, let's get started.


To begin, I took one of the new border dies and cut a bunch. I then arranged them on an ivory colored piece of cardstock, rotating them to create a fun pattern. I filled the entire piece this way. Then I took a rectangle die and cut that entire piece with pretty stitching all around.
I then chose three colors of cardstock and die cut two sizes of the scalloped circles and inked the edges. I wanted to create flowers using these die cuts and this is how I did it. Cut a wedge out of each, add some liquid glue, overlap the edges, and hold till dry.
I then used hot glue to add the smaller flower to the center of the larger one. After doing them all, I added liquid glue and tiny glass beads to create flower centers. For the smaller blue flower, I kept one die cut as is and only cupped one, and then glued it to the flat one.
To create the leaves, I used a stencil and Distress Oxide Ink and ink blended the leaf pattern. I then used scissors and fussy cut a small piece to get the leaves for the flowers. I arranged them on the card panel and glued with liquid glue. I then used hot glue again and placed the flowers over the leaves.

I used one of Kat's word dies and cut four, stacked them using liquid glue to create the sentiment. I chose a stamp set to get the sub-sentiment, "You are", and stamped in black and cut a flag end. I added foam tape and arranged both to the card panel and adhered in place. I finished off the "Blessed" by putting Glossy Accents on top.

I added some liquid Nuvo drops and a few black sequins to finish of the panel. I then added the entire piece to an A2 card base. I hope my project gives you some ideas to use your dies in a little different way. Obviously, this probably isn't a card you would be able to mail, unless in a small box or in a box with the gift. Or hand deliver with some treats or a present. You could also create some of these flowers using the larger dies and create a home decor piece and frame it to hang.
Here's the products I used with links to Kathleen's store to do some shopping. Also, use the code Cheryl10 to get 10% off your order.
Happy Crafting, everyone! Thanks for coming by.
 
Save

Thursday, August 24, 2017

You're How Old???

Good morning, Cheryl here today. I'm working with some new dies from Kathleen's own line at KatScrappiness. I hope you like how I used them. Here's what I did.


I cut three different sizes of the KS Stitched Postage Stamp Edge Circle Dies. I then chose appropriate sizes of the KS Double Stitched Circle Dies to cut out the centers to make gears. I then chose different shades of gray inks and used a sponge applicator to blend on the inks. I added acetate to the backs, filled with seed beads and another piece of acetate to seal them in. I did this for each die cut. For the smallest gear, I saved the cut out center and stamped my sentiment from Gerda Steiner's Moody Unicorns stamp set.  I had to snip the How Old? stamp in half to get it to fit within the circle.
I went through my stash of patterned papers and found this gray striped paper that I thought would fit for a masculine card perfectly. I trimmed it down to just shy of a standard A2 size card base and adhered down using tape adhesive.

I then used the new Sign Post Die Set by Kat Scrappiness to use for my sub sentiment. I again blended on some gray ink and stamped another of the sentiments from the Moody Unicorns stamp set. I then set out to arrange all my gears to appear as if they are locked together and would all turn if one turned. I used a liquid glue and adhered in place. I added foam tape to one end of the sentiment strip and layered over the largest die. I chose the Sangria Masquerade Sequin Mix from the KS sequin shop and picked out the muted/brushed looking metal colors. Sort of gold, pewter, bronze looking ones. I love this mix!!! I scattered a few around and glued in place.

So, here's your shopping list.

Happy Crafting!

Friday, July 21, 2017

Lots of Love...

Hello friends! Cheryl here today, with a card using one of the newest stamp sets just released.
I LOVE THIS STAMP SET!!! And I hope you do too. So here's my card.


I love lilacs for one thing, and for another....how great is this image?! So I got out my Tombow Markers and set out to coloring this pretty flower. I stamped the image on watercolor paper and embossed with black embossing powder. I stamped and embossed the vase on velum. I then sent it to my Brother Scan n Cut and it cut it out just perfectly. I even did it after it was all colored and it didn't make one mistake! I love this machine that much that I dare to do that, lol. I did two of them and then arranged them as I liked on the A2 sized card base. 


I used a piece of paper from Lawn Fawn's Watercolor Wishes paper pad, one of my favorites!!! Great watercolor papers with no fuss, lol! I stamped and embossed the sentiment in black and scattered around a few sequins. I got out my Viva Decor pearls and dotted around a few pearls and set aside to dry. I then added the entire piece to a heavy weight cardstock base. And that was it!

So, where do you get this set? You get it here. Check it out, and so many more awesome things!

Here's what I used.


So, get your craft on and make something pretty of your own. And check out the store for some really great crafting supplies. Thanks for coming by!


Saturday, July 8, 2017

Don't Flip Out...

Hey there, Cheryl here...thanks for coming by! I have a card today using one of the BRAND NEW dies from KatScrappiness. Her very own dies! And they're adorable!!! Check out what I did with the Stitched Dolphin Dies.


I started out by playing with some Distress Oxide Inks in Broken China, Faded Jeans, and Cracked Pistachio and created a watery looking background. I went back and forth numerous times till I got what I was hoping for...never know with water, lol! I then cut the piece with a KS Embossed Large Nested Rope Dies. I arranged the two KS Stitched Dolphin's Dies where I wanted them and ran through my Big Shot. I added acetate on the back side and created wells to fill with seed beads from my stash. I chose a clear glass color. Then added foam tape and covered over the wells with more acetate. That's the best way for me to keep them in and line up the card front easier to the card base.


I didn't want to  just throw away the dolphin cut outs, so I cut again with a pearlized ivory colored cardstock and offset them just a bit. I added foam squares to the backs right behind the head and used liquid glue at the tails. It appears they're jumping off the card front, lol. I offset these enough to see the shaker bits from underneath. I love the sound of shakers as much as seeing the bits shake about, lol. I added a black sticker dot for the eyes.


I then took a piece of the same pearlized cardstock and die cut using the same rope dies only a smaller one. I then lined it back in the die and shifted it to get a square and did a partial die cut. I chose a blue ink to match the background and stamped a sentiment from my stash that I thought fit nicely with the theme of the card. I popped it up with foam squares.

I then went in with some KS Blue Waters Jewels Sequin Mix and the muted silver color from the Sangria Masquerade Sequin Mix  and scattered them about. I also added a few drops of Grey Mist Nuvo Jewel Drops  here and there to look like water drops. I finished by brushing a bit of  Clear Overlay Sparkle Marker by Spectrum Noir to add a bit of glimmer to the dolphins. I then added the entire piece to an A2 size card base of Neenah Solar White in the 110 pound weight.

And that's it. Hope you like my project and will head over to KatScrappiness  and check out the supplies I linked above and find lots more awesome things! Happy shopping and happy crafting!


Save

Save

Save

Save

Saturday, July 1, 2017

From the Zoo…


Hi again, Cheryl here with another project to share.


 Today I’m working with a Gerda Steiner stamp set called Party Animals. Such cute images! So, I got out my Oxide Inks and did some ink blending and then used one of KS Stitched Heart Tag Dies. I cut one from the ink blended cardstock and four more from just white.
 You can see I only want the area with the heart with some above and below.


I then glued the four together to create the shaker well. Add a piece of acetate and trim so it doesn’t show. Then glue this to the back of the main, ink blended piece. Trim anything that shows from the front. Fill with your shaker bits and glue another piece of acetate to the back to keep it all in.


I added foam tape to all the other areas. I then stamped my sentiment onto some vellum and heat embossed with black embossing powder. I also colored and cut out my cute alligator with Distress Markers and cut out with my Brother Scan N Cut 2. I added foam squares to the back of the little guy.


I picked out the leaf shaped sequins and made a little cluster with a regular sequin in the center to resemble flowers. And added a few others as well. The patterned paper is from Doodlebug’s At The Zoo 6×6 paper pad. I cut it just a tiny bit smaller than the card base. Then glued the panel in place.


I love how easily these Oxide inks blend! So easy and no harsh lines. And today I see the next 12 are being released!!! Cannot wait! Anyway, that’s my card for today. Hope some of the process photos help to see how I did this. Get out your supplies and have some fun paper crafting! See you next time!

Here’s the products I used from the KatScrappiness Store.


Monday, June 19, 2017

KatScrappiness new stamps blog hop

Welcome!
Thank you so much for visiting my blog on today's 1st Celebration Blog hop for KatScrappiness.com. Today is so exciting! Not only will you be inspired by the designers projects along this hop, there is a lot of fantastic prizes to be won! 
You should have arrived here from Maria, but if I am your first stop you will find the full link up list at the end of this post or on Katscrappinessblog.com.


We are so excited to announce the addition of our first ever exclusive clear stamp sets! One that is perfect for interactive papercraft designs and one that is an adorable Giraffe! You will also catch a glimpse of some brand new dies and sequin embellishment mixes that are also exclusives. Check out all of the exclusive products at KatScrapiness.com


Here's the card I made using these products. Hope you enjoy!


I used KS Double Stitched Rectangle dies and cut  the patterned paper. Then I cut a rectangle sized to show the sentiment underneath. I stamped the cute giraffe and colored with Distress Markers. I cut it out on my Brother Scan n Cut machine. I also used a few dies from my stash for the flowers and leaves. I added them with liquid glue and some foam squares. I added foam squares to the back of the giraffe and positioned over the channel for the sentiment.


See? How cute is that, when you pull the strip, you find the sentiment. The patterned paper is mounted with foam tape, making the right size channel for the paper strip to fit and still pull out easily. 


I hope you have been inspired by my project.  In order for your chance to win one of the brand new stamp sets or one of the three grand prizes you must comment on all the designers blogs and the Kat Scrappiness blog. That is over 10 chances to win! Winners will announced at 12 noon pst on 6/25/17, you have until 12:00 midnight pst Saturday 6/24/17 to enter!


Next person in the hop is Mona. Hop on over and see what’s next!

Here's your shopping list:

Here's the list from start to finish. Thanks for coming by! 
Happy Crafting!

Cheryl ~ You are here
 

Sunday, June 4, 2017

Unicorn Love...

Cheryl here, with a fun unicorn card. Recently I got some cute stamps of these, a little late to the party, lol. But I'm loving them. Let's check it out.
I stamped my images with Copic friendly ink, as I knew I'd be coloring them with those markers. Then I loaded them on my Brother Scan N Cut mat and cut them out with a small border. I proceeded to color them up.


I used KatScrappiness Double Stitched Rectangle dies and nested two together to create a frame. I used paper from Lawn Fawn called Watercolor Wishes Petite paper pad, sold in Kat's store. I added acetate to the back and ran two layers of foam tape around the sides. Chose a variety of sequins to make a shaker card. And then backed it with another piece of acetate. For me, doing that makes it easier to add to the card base, as it's easy to work it as the sequins are contained. I colored the images and added Spectrum Noir Sparkle brush over the hair and rainbow. I added Ranger Rock Candy Stickles to the clouds for sparkle.


Hard to pick up the sparkle without serious blowout on the acetate. Frustrates me, lol. I attached the shaker element to an A2 card base having added another paper from Lawn Fawn's Perfectly Plaid Rainbow Petite paper pad. I stamped the sentiment onto another piece of the Watercolor Wishes in green using a gray ink. Cut a flag end and added to the card front. Scattered a few sequins and glued them down.
And that's about it. I love all the fun bright colors in this paper! It makes for some really pretty cards. I hope you found a bit of inspiration and will get out your supplies and make some time for crafting. Thanks for coming by!
Here's a coupon code for some shopping in the KatScrappiness store. Use Cheryl10 for 10% off!

Save