
Well, the holidays are behind us and the new release is out as well. So, it's back to our regularly scheduled programming...lol. Seriously though, the DT is getting back to it's regular schedule and I have a layout to share with you today. It's supposed to be Smashbook or Project Life style, but I'm not doing Project Life and she said we could do a regular layout too. So, I'm liking the 8x8 size pages and that is what I'm trying to focus on. I want to get some nice books put together of my beautiful grand babies. So, since Karson just turned one, I took this opportunity to do a layout of him.
Miss Shar had given us a photo to use for inspiration. I took a few ideas from it to get started. It had a wall piece that looked sort of like a ladder on it's side...lol. Like squares in a row...hard to describe, but I used that to get the layout for my title. I then used some of the colors that were in the inspiration photo. I chose the yellow, red, and blues to work with. And these papers were great for that theme.

Here is the layout I did for him. Ahhhh....he makes my heart melt! Anyway, it's obvious he loved his cake, lol. I layered this photo on a blue mat and then on dark brown. The papers I used for this are from Echo Park's Little Boy collection. I also used some of the elements in that kit....the stars and the "Oh Boy". I used my Silhouette software to trace the stars, made a mat for them, and then printed and cut them. For the Oh Boy, I did not cut it on my Cameo, I used a die from My Creative Time to cut that out.

I printed it, and then I used a piece of scrap paper and cut it using the die. This created a frame for me to see exactly where to line up the the sentiment so it cut right where I needed it to. I laid the frame on just right, put the die back in place, and used a bit of tape to keep things from moving . I ran it back through my Big Shot and it cut the sentiment exactly how I needed it to. A good trick to remember when you need to cut in a specific spot and obviously can't see through a metal die! Worked perfect! I cut another one in dark brown to layer just at the ends so it popped a bit more, cutting off any brown that showed where I didn't want it to. I wanted just the ends.

Now, on to the title of my page. I cute some small squares of white cardstock. I needed to take some of the harsh white away so I used some Tea Dyed Distress Ink from Tim Holtz to make it look a bit more aged. I used the alpha dies from MCT to spell out I'm One. I popped the squares up on foam dimensionals onto blue cardstock and then onto dark brown. I tied a bit of twine to separate the words.
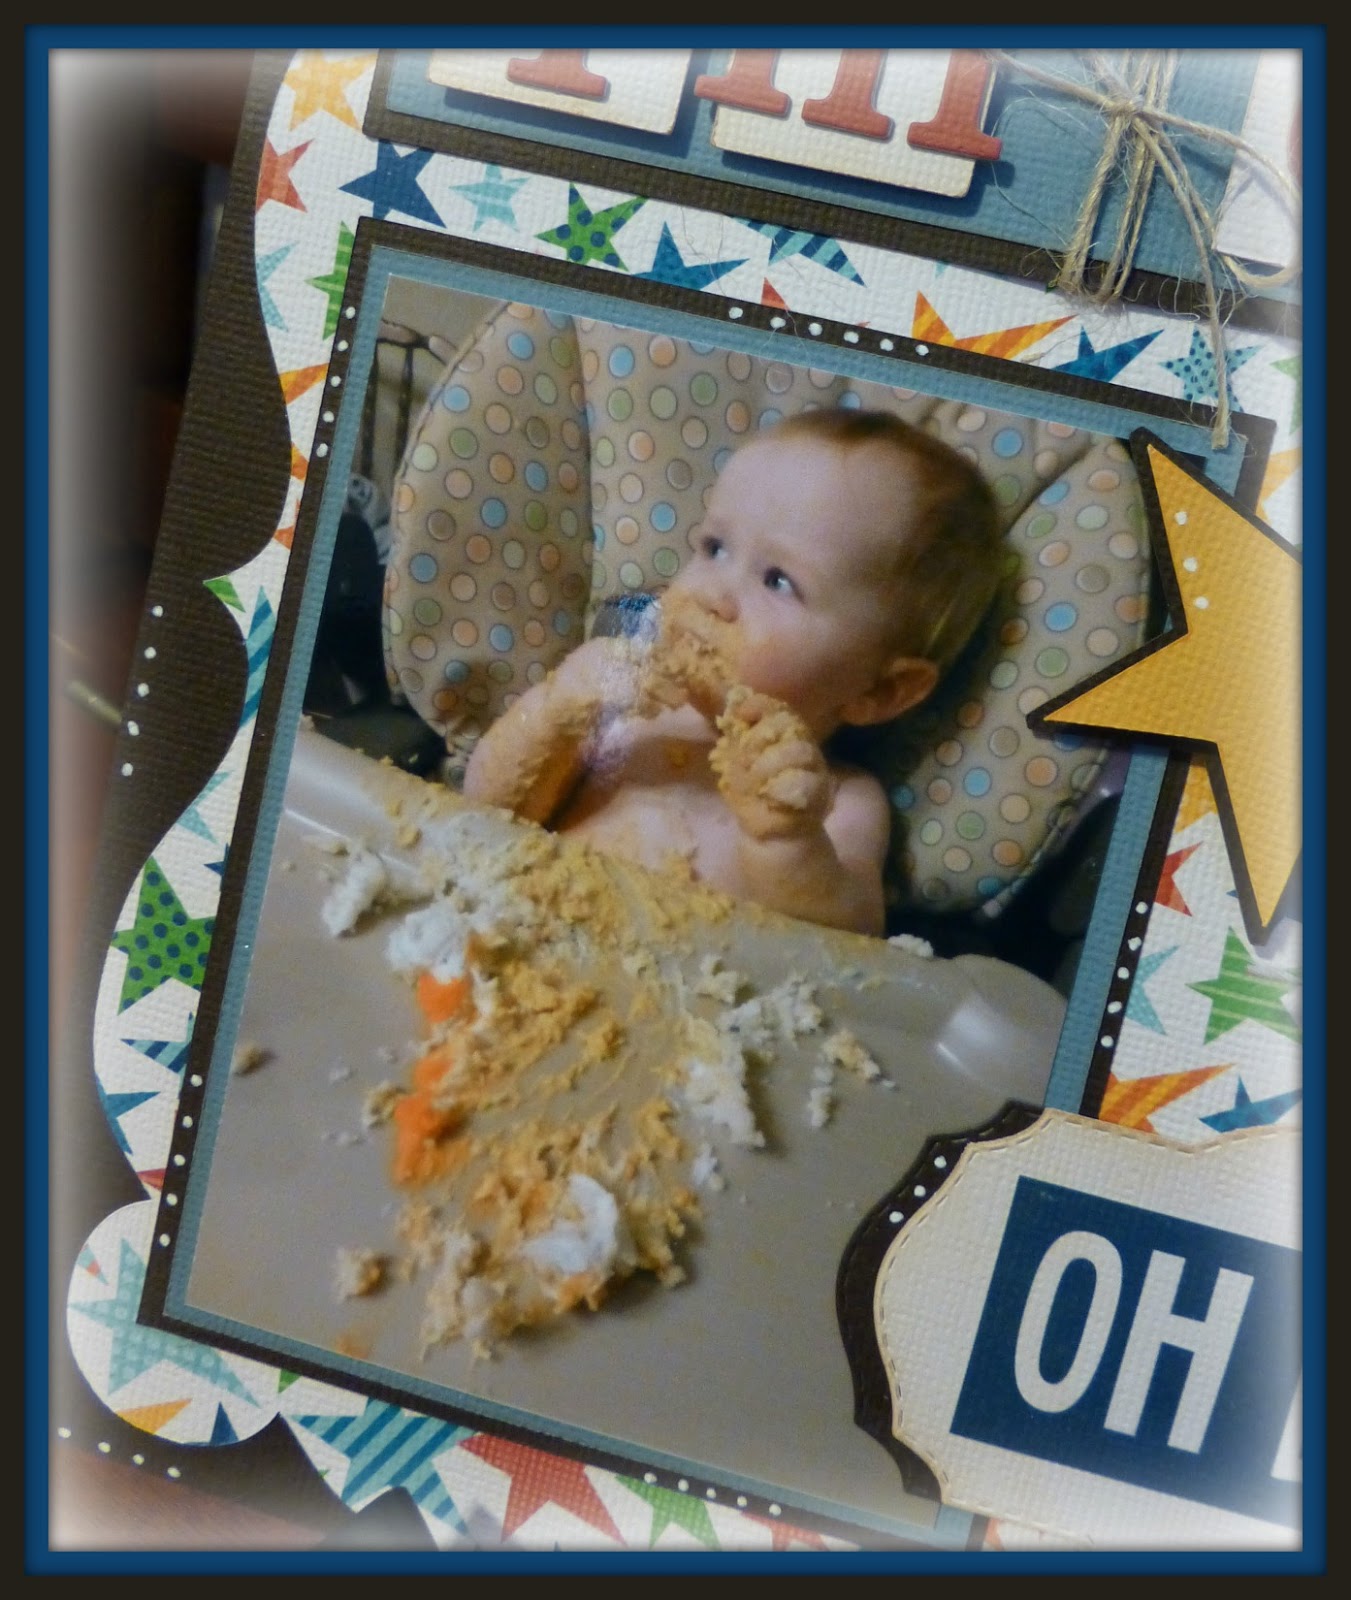
Isn't he the cutest?! Sorry, I'm a NeNe...I get to brag a bit...lol. Really though, he surprised us cause we didn't think he would do much with his cake. Well....were we ever wrong! He got right in there and there was no stopping him. He loves his food! To finish off my page, I added a bit more twine to a star, and got my white gel pen out and made some white dots throughout the page. It's sort of my thing, that white gel pen! I always seem to have to do that...oh well, whatcha going to do?! I am not a big scrapbooker but I'm liking these smaller size layouts and have to say, I'm enjoying it! Who would have thought...lol.
So, on to what I used.
If you aren't into scrapbooking like I really wasn't, start by maybe trying a smaller layout style. It helped me! Let's just say, going from a card to a full 12x12 page scared me to death! It was just too much space. I would get into panic mode! But, I do really like these smaller pages and I can at least get some memories saved! So, stretch yourself some...do something that is challenging for you. You may realize, as I did, there is more than one way to do something!


Great job on this layout! The 8x8 is perfect for this! Love and Hugs ,Cathryn :)
ReplyDeleteAdorable layout! I love the papers you used, and the way you arranged the stars is so cute!
ReplyDeleteReally cute LO...beautiful baby too! Lee-Ann :)
ReplyDeleteSOOO super darling! I LOVE that paper from EP and I LOVE your layout! And you never have to stop bragging when you have one that cute! :) My mom goes by meme (pronounced maymay). Too cute! So happy to be on the DT with you! :)
ReplyDeletecute layout!! love the colors!!! and looks like he did enjoy his cake! so cute!!
ReplyDeleteOh WOW Cheryl,your layout is FANTASTIC!I LOVE the fun paper and colors,SUPER job as always my friend!!!:)
ReplyDeleteWhat a great layout! Love all the bold colors and shapes - they really compliment your photo! Great job :)
ReplyDeleteVery cute LO, love all the elements and papers you used, and how you kept your adorable grandson the focus.
ReplyDeleteCheryl ~ Oh this is a SUPER LO!!! Just LOVE the alpha dies, how you used the vintage die and those stars! All the details are AMAZING!! Of course you can brag ~ your the grandma!!! He is such a CUTIE!!! AWESOME job!! Oh happy 1st birthday to him too!
ReplyDeleteGreat job on the layout! So cute he loved his cake :D Maybe he will not be a picky eater which makes life easier. Your explanation of how you embellished the page and your white pen are perfect.
ReplyDeletequilt 4 fun 2 at hot mail dot com
Aaaaawwwwwww I love kiddo's birthday LO's so stinkin' ca-ute your pics are awesome and your pages are awesome too nothing more precious and what a treasure for sure.
ReplyDeleteOh I just love this layout!!! I'm a new follower!
ReplyDeleteJaren
purpleparadisecreations.blogspot.com
Great job! I just want to kiss that cutie!!!! These colors are just perfect for the layout!!! hugs my friend!
ReplyDeleteNancy
SUPER CUTE my friend!!!!
ReplyDeleteHUGS,
Emma:)