Wednesday, March 6, 2013

Happy Egg Hunting...


Here we are again for another 3D Wednesday. I love making 3D projects....well, I just love  making things with paper...lol! Anyway, since our area isn't getting snow this year, it might just as well be spring. So, that's what I did...something for spring! This year I will have my two precious grand babies hunting for Easter eggs.  Can't wait! So, in anticipation of that, I made a little Easter basket.


Isn't it cute?! Bet you can't guess what I used to make it....yep, I used the new die for the slider box. I cut out four of them. If you notice on one end of the die, there is a half scallop. I scored right at that scallop and used that as the glue tab to glue the other panel to. I did the same thing for all four panels. When all glued, you have a cube with no bottom. When put together, add a wide strip of designer paper to go all the way around.

To make the bottom, I cut a square of cardstock 6 7/16 x 6 7/16. Score at 1 inch on all four sides. On two sides, cut the short score line up to the first long score line. Now, fold up the sides all around and glue sides in place. It will be tight, but you can now push it up into your cube to form a bottom. I pushed mine up to where the scallops stop....so the scallops almost act as feet all the way around. I am sure you know how to make a simple box, same deal just really short. There might even be tutorials out there. 


Isn't this bunny cute? I got this file from SVGCuts. It's one of their many cuddly characters. I used dimensionals under the head and the feet to add dimension. I used my Martha Stewart grass punch and made them two different widths. I layered the shorter on top of the wider. Do this on all four sides. I tucked my bunny and some eggs using the egg die, in and around the grass. Cut out a button with the new die, and added a hemp bow behind it. I attached it with hot glue. 


I also added some butterflies and another button with a hemp bow. I like to decorate more than just the front. The sides need to be cute as well. 


Here's the other side. I used the new bunny die. On one of them. I cut a bit off the bottom to make it shorter. Hidden in the grass. I'm soooo in love with all the new dies from the last set, I can't stop using them! And why should I, right?


 Here's the scallop stitched circle dies with one of the Easter all around stamps. Another little button and hemp bow added in the center. I hot glued it on a wire I had wrapped around a skewer. 


 I even added a butterfly to the handle using the new dies as well. To make the handle, I cute several pieces of the green with one of the dies that comes with the slider box. I cut a narrow strip of designer paper and glued it right up the center to make it a bit cuter. I love how this turned out. You can make these as simple or as fancy as you'd like. Simple if you're pressed for time, fancy if you want to take it to the next level. 

So, here is what you will need to make one of these.

SVGCuts ~ Bunny
Martha Stewart Grass Punch

I hope you enjoyed what I made to share today. If you like it, try making one for yourself! Use what you have, you don't need this stuff...I did cause I have it. Decorate it however you like. Happy Crafting! 

Thursday, February 28, 2013

Thinking of You...

Today is Thoughtful Thursday. We were to make a card with the theme of Get Well, Thinking of You, Sympathy, or something else along that line. Here is the card I made. Hope you like it.


I love when printing papers at home, they just work perfectly for you! I printed a 6x6 page of papers from Carta Bella's Beautiful Moments. This flower flourish fit perfectly right in the corner...so I used it! It was so pretty as is and couldn't see cutting it up. 


Here is the element I created to go with it. I LOVE how Miss Emma's entire store works so well together. I used several dies, some new and some old....but they go together so great! Miss Emma showed a bit in her video from yesterday how to shorten or lengthen when cutting with her dies. I did that with the open scallop piece in the rust color. I added one more scallop to it to make it just a tad bit longer. I then layered them all together and used dimensional adhesive under the layers.


This picture gives a better look at all the dimension. I also inked the edges a bit to add to the dimension. Added a dark brown pearl to the center of the flower and called this element done!


These sentiments in this set are one of my absolute favorite stamp sets from Emma. I love the font and love the size of the sentiments. They give such a substantial appearance. 

So...here is a list of the products I used to create this card.


I hope you enjoyed my card today. I hope that you will give some of these products a try. Or use what you have to recreate something similar.  Happy Crafting!


Sunday, February 24, 2013

Speedy Recovery...

Here's another card I made today. Hope you like!
 
 
This another card using the set of A2 Cards For All Occasions from SVGCuts. I love the swirly frame card fronts. They come with a cute element to add after you attach the card front. Very quick and easy cards...but you can jazz them and add more details if you want. I used my white gel pen to add some stitching lines.
 

I added a cute button using a die from My Creative Time. Love them! Tied it with a bit of twine. Love the white gel pen too!

 
 I used the mustache dies and turned them upside down to use as leaves for my flower. Just cut a narrow strip of paper for the stem. I think it's cute!!!


I used the label dies and butterfly die from MCT along with a sentiment. I just love how all of Emma's products work together...the new with the old. You should give her stuff a try, you won't regret it!


And to finish off the inside...three little buttons. 
So...here is a list of products I used to create this card.
 
 
Gather up what you have and make some cards like this. So fast and easy....make them as detailed as you'd like. Happy crafting! 


Silver Lining...

I took some time today and must made cards. I pulled out some old files from SVGCuts and using new papers and adding some extras to them, they came out really nice and fresh looking. I hope you like them. Here's the first. 
 

The card set is called A2 Cards For All Occasions. They have these nice swirly card fronts and then little pieces to add on top. This one has a cute flower for the corner. I cut the one sized as is in the file, then I scaled it down and cut two smaller.
 
 
I layered them and trimmed off what hung over the edge. I added a button from My Creative Time with some orange hemp. I added a bit of white gel pen for accents.
 
 
My label and stamp are also from My Creative Time. Love these stitched labels, they are so perfect for layering and make the sentiment look so pretty. I popped it up on dimensional adhesive.
 
 
I had an extra flower from the front that cut wrong. No worries...it fit nicely on the inside corner. Nice to put a special something on the inside.
 
So...here's what I used to create this card.
 

So, I hope you'll pick up these items and make some cool cards of your own. After all, there's nothing like receiving a hand crafted card. Thanks for coming by!


Wednesday, February 20, 2013

Hippity Hoppity....


Happy Wednesday! I hope you are having a crafty week! Did you like the new release? Wasn't it fantastic! I'm having so much fun still playing with some of it. I have another project to share with you today, on this 3D Wednesday.

Here's a cut little box that only takes one 12x12 sheet of paper.  I went through my digital files and printed off a piece from Echo Park's Country Drive. So Springy! 

I used some new and some old in this project. I love the bit of colored twine on here, just says Spring to me. How cute is that little button?!

I used the egg dies from a set from last year. I also used one of the stamps to stamp the design, and used clear embossing powder just so they had that extra something. Love the little chocolate bunnies tucked in there! Makes me want one of those hollow chocolate things...bite off an ear...lol! Stamped the sentiment and layered to of the banners together. Curled it on the ends and in the center to make it look like a banner for real.


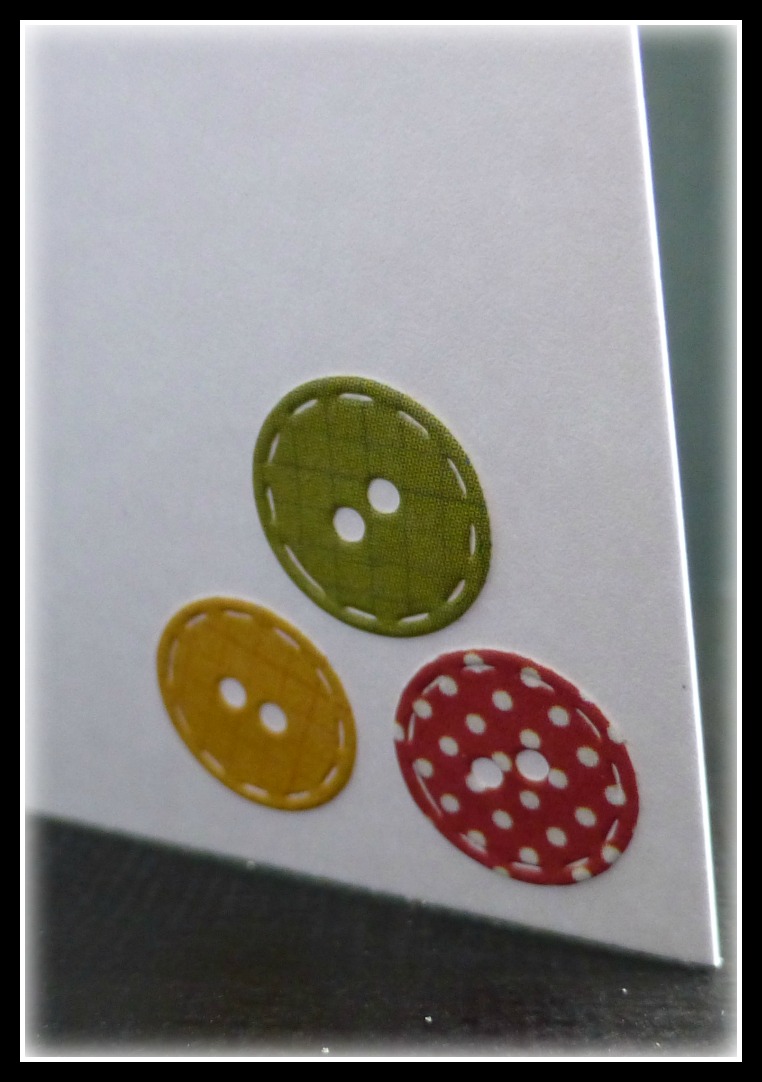
One of my favorite set from the new release is the buttons!!! Such a little thing adds such cuteness. And I love that it matches perfectly....and that little stitching is to die for! Did you notice the bottom edge? Yep, it's one of the banner dies. I cut enough for each side, to finish the bottom edge a bit.


Fill it up with some Easter candy or a small toy or whatever you'd like. Being these are so fast and only take one sheet of paper, you could whip out a bunch of these really fast for students, co-workers or neighbors. Have fun, decorate them in your own style. The file from SVGCuts has a window in the lid, but I wanted to use these dies, so I cut it out in blackout style, getting rid of the window. But it's super cute with the egg shaped window too...you could do either. 

So, here's what you'll need to recreate this little box.

Pick up these ingredients...lol...or use what you have in your stash.  Whoever gets these will love them! Have fun crafting!  


Friday, February 15, 2013

***BLOG HOP GIVEWAY ALERT***
For our Blog hop giveaway, there will be 2 winners chosen from ALL the comments combined!  Both winners will win a $25 Gift Card to my store!  All you have to do is leave a comment here along w/the rest of the design team's blogs AND also leave a way for us to contact you!  Emma will use random.org to pick the lucky winners!  All you have to do is leave a comment on all blogs in this hop for more chances to win! The deadline is Sunday, Feb 17th at midnight! I will announce winners on my blog on Tues, Feb 19th!  EASY PEASY!!! GOOD LUCK!:)


So....blog hop day has arrived! So exciting! This has been so fun playing with the new release, teasing you all a bit till the big reveal! I hope you have enjoyed all our projects and got some great ideas. Enjoy the hop, and I hope you like my project I have to share with you today!


 I used a file from SVGCuts to make this cauldron. I love this little box and have made it a lot. You really can make it for any reason or season, changing up the papers will really make it special and not look like a cauldron...lol. I filled it with gold wrapped kisses to make it really look like a pot of gold....they are the chocolate with almond ones.


I used the new ticket dies and stamped my image. I used dimensional adhesive to layer the tag and used hot glue to attach it to the box. The shamrocks are also a new die. I added glitter just to the very centers of the petals and added a gold pearl to the center. I wrapped twine around the rim several times and tied bows at the handles. I coiled up two layers of wire, punched holes in the rim and twisted the ends of the wire to attach it to the pot.


This tag die is also new...love it! Makes for a super nice little extra to tie on any project. This little stamp is
from one of Emma's older sets. I love how you can incorporate what you may already have with the new. Don't forget to use your older sets....they are just as great as the new! I tied this on with some hemp from Liz's Paper Loft Boutique.

Here is my list of sets I used on this.

You're My Pot of Gold ~ New Release
Chunky Jar Accessories ~ New Release
Stitched Fun Ticket Dies ~ New Release
I believe in Leprechauns
SVGCuts ~ Party on Elm Street, cauldron
Liz's Paper Loft Boutique ~ Hemp


Head over to the other designers blogs and see what they have for you. Leave your comments for your chance to win the drawing Miss Emma is having. 
Kim


Liz 


Barbara (Guest Designer)


"TREAT SLIDER DIE" 
Since this "Treat Slider Die" is a larger die, this will ALWAYS be a "PRE-ORDER" item. Please allow a 2 week turn around for delivery of this die! ALSO, this will be sold individually & will NOT be included w/the bundle!


This is a PRE-ORDER item ONLY!!!
Please allow 2 weeks for delivery. 
***This item MUST be ordered separately from all other items due to new shipping costs***
DISCLAIMER: If this item is purchased w/additional items, My Creative Time will need to invoice you for the shipping costs on this item before shipping out to you. Thank you.

This is a PRE-ORDER item ONLY!!!
Please allow 2 weeks for delivery. 
***This item MUST be ordered separately from all other items due to new shipping costs***
DISCLAIMER: If this item is purchased w/additional items, My Creative Time will need to invoice you for the shipping costs on this item before shipping out to you. Thank you.

Thursday, February 14, 2013

Treat Slider Box...

Sneak Peek Giveaway Time!With all of our Sneak Peek weeks, Emma likes to do some FUN giveaways!
 *** This time around we are doing something a little bit different this time around!;)  All you have to do is leave comments on our blogs! You do NOT have to comment on every blog, BUT if you do, you will just have more chances to win! The thing we are switching up this time, Emma will be picking a winner that night & announcing the winner the next morning! Example: for Monday's sneak, leave your comments here & share on facebook, then Emma will annouce the winner (for Monday) Tuesday morning! That means a winner will be anounced every day during sneaks! 
 ***SPREAD THE WORD TO THE WORLD ON FACEBOOK about this release & whatever connections you may have! Let us know on "My Creative Time's" FB page here http://www.facebook.com/#!/pages/My-Creative-Time/364568506334 that you did so! OR you can just tag me in your post!
 GOOD LUCK!
 Log onto to your facebook now & let start spreading word!;)
Well...today is the final day of sneaky peeks for this release. Haven't you just loved everything?! I tell you....some really CUTE stuff. Today, I am using the Treat Slider treat box. Such a cute little box for a bit of goodies. 


 Isn't this cute?! I love how it turned out. I used a lot of the new stuff but threw in some older as well.  I just love these little keys....they add such cuteness!!!


 This is one of the new dies and new stamp in this release. I added this with some dimensional adhesive under it. I tucked that little key right under it...so cute!


Here is the other two keys in the set and I added a bit of hemp tied in a little bow. It's from Liz's Paper Loft Boutique.


This 3D flower is so perfect to add to any little project. I used my chunky glass glitter to give it a sugared look. Looks good enough to eat...lol! I layered it on top of the Scallop & Stitched Circle Dies. I love all the layer look on this piece...even though it's small, you can really jazz it up. If you look close, you can see that I used the Stitched Doily Die underneath all of it, wrapped around the lid piece. Such cuteness!


And then there's the goodies inside! Who doesn't want a bit of candy once in awhile?! This will hold 4 of the chocolate nuggets you can get at the grocery. It comes with two different types of wrappers for the nuggets. I used the scallop edged one. The other is plain and could have a sentient stamped on it. What a cute way to give a little treat that could be for any occasion.

So, here's the list of what I used.

Stitched Doily Die ~ New Release
Treat Slider Treat Box ~ New Release
Chunky Jar Accessories ~ New Release
Liz's Paper Loft Boutique  ~ Hemp

"TREAT SLIDER DIE" 
Since this "Treat Slider Die" is a larger die, this will ALWAYS be a "PRE-ORDER" item. Please allow a 2 week turn around for delivery of this die! ALSO, this will be sold individually & will NOT be included w/the bundle!

So, there you have it. I hope you enjoyed seeing another of my projects. Don't forget to leave your comments for a chance to win the drawing! And don't miss all the things the other designers have made. This is an amazing release and I hope you will join us for the blog hop on Friday, 8:00 AM, PST...at which time the release will be available for purchase.


Tuesday, February 12, 2013

Fun Tickets Fathers Day Card...

Sneak Peek Giveaway Time!With all of our Sneak Peek weeks, Emma likes to do some FUN giveaways!
 *** This time around we are doing something a little bit different this time around!;)  All you have to do is leave comments on our blogs! You do NOT have to comment on every blog, BUT if you do, you will just have more chances to win! The thing we are switching up this time, Emma will be picking a winner that night & announcing the winner the next morning! Example: for Monday's sneak, leave your comments here & share on facebook, then Emma will annouce the winner (for Monday) Tuesday morning! That means a winner will be anounced every day during sneaks! 
 ***SPREAD THE WORD TO THE WORLD ON FACEBOOK about this release & whatever connections you may have! Let us know on "My Creative Time's" FB page here http://www.facebook.com/#!/pages/My-Creative-Time/364568506334 that you did so! OR you can just tag me in your post!
 GOOD LUCK!

Oh my heavens...hold on to your hat! This release will blow your mind! And I'm not kidding. Today is another peek at some amazing new stamps and dies. I know you will see lots of cool stuff and get some great ideas to use in your own crafting. 

Today, we are showcasing the Fun Tickets and the Fun Ticket Dies. Yowzers...are they ever cool!  Here is what I made for you.


I made a 3D shadowbox type card that will fold flat for mailing and then pop back open to stand. I used a file from SVGCuts and cut it in blackout so I could use the die from MCT to cut the opening. I printed some cute digital paper in the mustache theme...HOT right now! The first thing I did was use the Stitched XL Label die to cut a hole, centered in the front panel of the card. Then I did the same to the orange piece of cardstock using the XL Label die. I lined that up to frame the first cut, made tic marks where I wanted to trim it down, and glued it to the front. I then lined the inside back with the printed mustache paper. I cut the three mustaches from three colored papers to coordinate, and attached them to the back with dimensional adhesive, then closed up the box.


This pic gives you a better look at the 3D style of card. And you can see a bit better how I layered the two openings. 


Get a look at these stamps and dies!!! OMGosh...how cute are they?! I chose Cool Dad and It's Your Day to create a Fathers Day card. Or you could use this for a birthday card too. I layered the two die pieces with dimensional adhesive, stamped and cut out a few mustaches from an older set, added some hemp with a button. LOVE these stamps and dies!


Here is a look at the back of the box/card, I stamped Happy Fathers Day and the mustache and left enough space to write a little note. Then, at the bottom, I used the XL Label Dies again to make a pocket. I used Scor Tape only at the bottom and on the sides. This allows you to slip in the Free Admission tickets. This will be given along with movie passes for a date night. How cute is this to give some movie passes? Love it, don't you?

This collage gives you a closer look at this pocket. Love how the XL Label Die worked perfect for this...makes for a super cute little pocket, I'd say!

I hope you like what I made for you to see this part of the new release. Make sure you check out what the other design team members made as well. You won't be disappointed. Also, leave your comments for your chance to win the give away Miss Emma will be having. It will be fantastic....it always is!

So, here is what I used to create this project.

Fun Tickets ~ New Release
Fun Ticket Dies ~ New Release
SVGCuts ~ Card Base
Kika Digital ~ Papers

Hope you enjoyed my project for you.