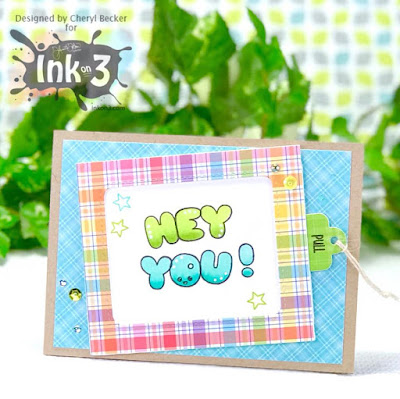
Hey crafters, Cheryl here today, with a super cute slider/window card to share with you.
Here's the stamp sets I used.
This is probably one of my all time favorite InkOn3 stamp sets! I mean, come on, what's not to love???
Anyway, I stamped out a few of the images and colored with Copic markers. And I didn't even do any shading, simple one marker coloring. Maybe I better show you what I used to make the card first.
I used this die set from Lawn Fawn. There are videos on YouTube to show how to assemble, it's easy!
On the pull tab/slider piece I stamped "Hey You" using the Phat Alphanumeric stamp set using Blackout ink. I colored them in with Copic markers and stamped a few stars.
I cut one piece of cardstock just a tad smaller and
stamped my inside. The dragon, the flame, and the candle. I also stamped some stars.
I again colored these with simple one marker coloring. On the flame and candle I used two. Following the instructions in the Lawn Fawn assembly video I closed up my slider. I'll link the video at the end.
Then I went through my patterned papers and pulled out some to match my color pallet. I picked a blue pattern and adhered it to an A2 card base of Neenah Desert Storm cardstock.
I then added the slider to the front of that on an angle.
I picked out some gems and sequins and added to the front. DON'T put any in the way of the pull tab slider or it won't open. Ask me how I know, lol. I pulled out my Nuvo glimmer brush and picked a few areas to add shimmer to. It makes things look so pretty!
And that's it! It's so fun to make this type of card and fun for the recipient! If you're a paper engineer, you could probably make this slider from scratch. I'm not, and knew I'd use this often so I picked up from Amazon. Glad I did!
Lawn Fawn Magic Color Slider (video on their website)
Ok, take some time for you and sit down to "play" with supplies you have.
Happy Paper Crafting!


No comments :
Post a Comment